The previous owners had every room tested for lead content, and the dining room was particularly toxic.
The first job was removing all of the woodwork. This was pretty fun, though startling to find how many pieces there were. Nearly 300 linear feet of woodwork in all. I labeled the back of each piece with a sharpie marker so we’d be able to put Humpty Dumpty together again someday. (North Window, Right jamb for example). Also, the quantity and size of nails used to attach the original trim was staggering, at least 150 nails had to be carefully removed to begin refinishing.
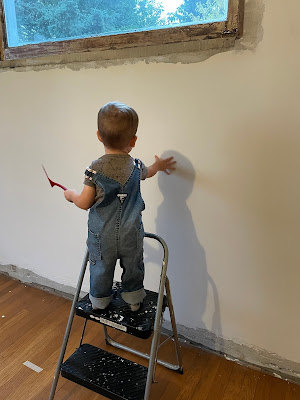
After the plasterers finished, the room was so dusty. I gently brushed the dust off with a broom. Vincent was enamored with the process. He kept grabbing brooms and rubbing the walls for weeks. Or, if a broom wasn’t available, a spatula or any tool would do.
Then I primed and painted the walls cream to match the kitchen.
During the same time, Stephen removed the cast iron radiator. He sealed the supply and return pipes with rubber plugs that could be tightened by thumb screws. During the day, we turned off the heat, removing the pressure. But in the evening, we wanted the heat back on as the nights were getting colder in the Fall.
Stephen wheeled the 300lb+ radiator outside to pressure wash and refinish it. The first paint color “bronze” we picked was too dark, basically black. We tried again with gold, hoping to match Stephen’s restored antique chandelier. We loved it! We were so happy to reinstall it after Stephen stained and varnished the floor.
Multi-faced pieces took more work. Stephen slowly worked through the layers using a palm sander and sanding by hand.
Finally, some pieces couldn’t be removed- two fixed window sashes had to be refinished in place. Stephen estimates every surface was sanded seven times to get to bare stainable wood.
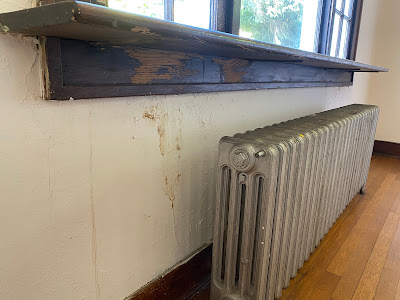
We found one reason why: the wood trim was not stained and varnished, as one would think at first glance. Instead, it had been painted with a faux-finish, meant to imitate wood. This alarmed Stephen, because it seemed like a probable sign that the wood underneath was not high quality and wouldn’t take stain well.
We attempted to do some research on faux-finishes- is it something we could replicate ourselves? What would it cost to hire someone to do? We kept hitting dead ends. Stephen finally decided he would stick to the stain and varnish plan.
Deconstruction
The first job was removing all of the woodwork. This was pretty fun, though startling to find how many pieces there were. Nearly 300 linear feet of woodwork in all. I labeled the back of each piece with a sharpie marker so we’d be able to put Humpty Dumpty together again someday. (North Window, Right jamb for example). Also, the quantity and size of nails used to attach the original trim was staggering, at least 150 nails had to be carefully removed to begin refinishing.
Walls/Ceiling
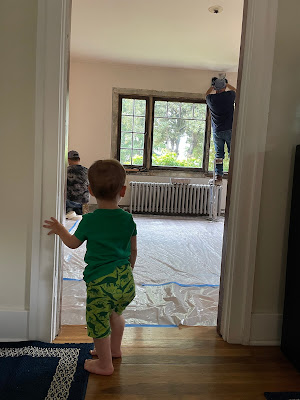
We hired someone!This is unusual for us. Stephen has done some plasterwork himself, but wanted a professional finish. Having all the woodwork removed made for easy access to our walls and ceiling. Vincent supervised Quality Control to ensure the walls were finished to his specification.
After the plasterers finished, the room was so dusty. I gently brushed the dust off with a broom. Vincent was enamored with the process. He kept grabbing brooms and rubbing the walls for weeks. Or, if a broom wasn’t available, a spatula or any tool would do.
Then I primed and painted the walls cream to match the kitchen.
Floor
We weren’t planning on refinishing the floor. But… we had our first small disaster. While we were out of town, an irrigation sprinkler was bumped and sprayed the (unsealed) windows for 10+ days. The windows were only covered by plastic and tape, and our 100 year old wood floor got soaked. It already had a hard life, but now it was even worse. Stephen then rented a floor sander to strip and refinish the hardwood floors as well.During the same time, Stephen removed the cast iron radiator. He sealed the supply and return pipes with rubber plugs that could be tightened by thumb screws. During the day, we turned off the heat, removing the pressure. But in the evening, we wanted the heat back on as the nights were getting colder in the Fall.
The pressure built up, and the rubber plug burst open! Fortunately, we were in the next room. I grabbed the shopvac to start sucking up water that quickly began flooding the room, and Stephen ran to the basement to turn off the system. The floor didn’t sustain new damage since we were quick. But Stephen applied a bunch of clamps and set a motion-activated camera to watch the plug. We slept a bit anxiously - but, had no further problems with it.
Stephen wheeled the 300lb+ radiator outside to pressure wash and refinish it. The first paint color “bronze” we picked was too dark, basically black. We tried again with gold, hoping to match Stephen’s restored antique chandelier. We loved it! We were so happy to reinstall it after Stephen stained and varnished the floor.
Sanding
We started the project while the weather was still warm. Stephen bought a planer on craigslist and started sanding in the front yard. All the flat pieces could be sent through the planer to shave off layers of varnish and paint down to bare wood.Multi-faced pieces took more work. Stephen slowly worked through the layers using a palm sander and sanding by hand.
Varnishing
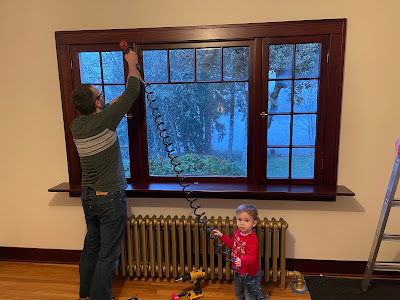
The trim took much more work than the floor, of course. Stephen initially treated the freshly sanded wood with a mahogany stain and varnished it using his paint gun for an exceptionally smooth finish.Initially he wasn’t satisfied with the results of the stain: the wood had a dramatic two-tone grain. He wanted the color to be more uniform. Next, he used a tinted varnish to darken the overall color of the wood and we were surprised to find out it had a reddish tone. But, the finished product was beautiful and had a furniture-grade finish. Suddenly, the old wood looked like it had come clean out of the factory.
We recorded the process for another Youtube video. We had recently purchased a new-to-us dining table, sticking with the Arts and Crafts style and matching the china cabinet we’d recently found. Stephen finished just in time for Christmas dinner in our new dining room.
Stephen refinished his antique chandelier in 2020. He made this excellent video of the process:


